> ## Documentation Index
> Fetch the complete documentation index at: https://honeydew.ai/docs/llms.txt
> Use this file to discover all available pages before exploring further.
# Okta SSO Integration (OIDC)
This guide shows how to configure [Okta](https://www.okta.com/)
as an OIDC single sign-on identity provider (IdP) for your Honeydew account.
Optionally, it is possible to create a SCIM integration from Okta to Honeydew and to sync user profiles to Honeydew using the SCIM 2.0 protocol.
This is especially useful if you want users to be deactivated in Honeydew when they are deactivated in Okta.
This integration will require two applications to be registered in Okta: the OpenID Connect integration and the SCIM integration.
The same users and groups must be assigned to both.
Create the Honeydew app integration in Okta.
1. Login to your **Okta Admin Console**
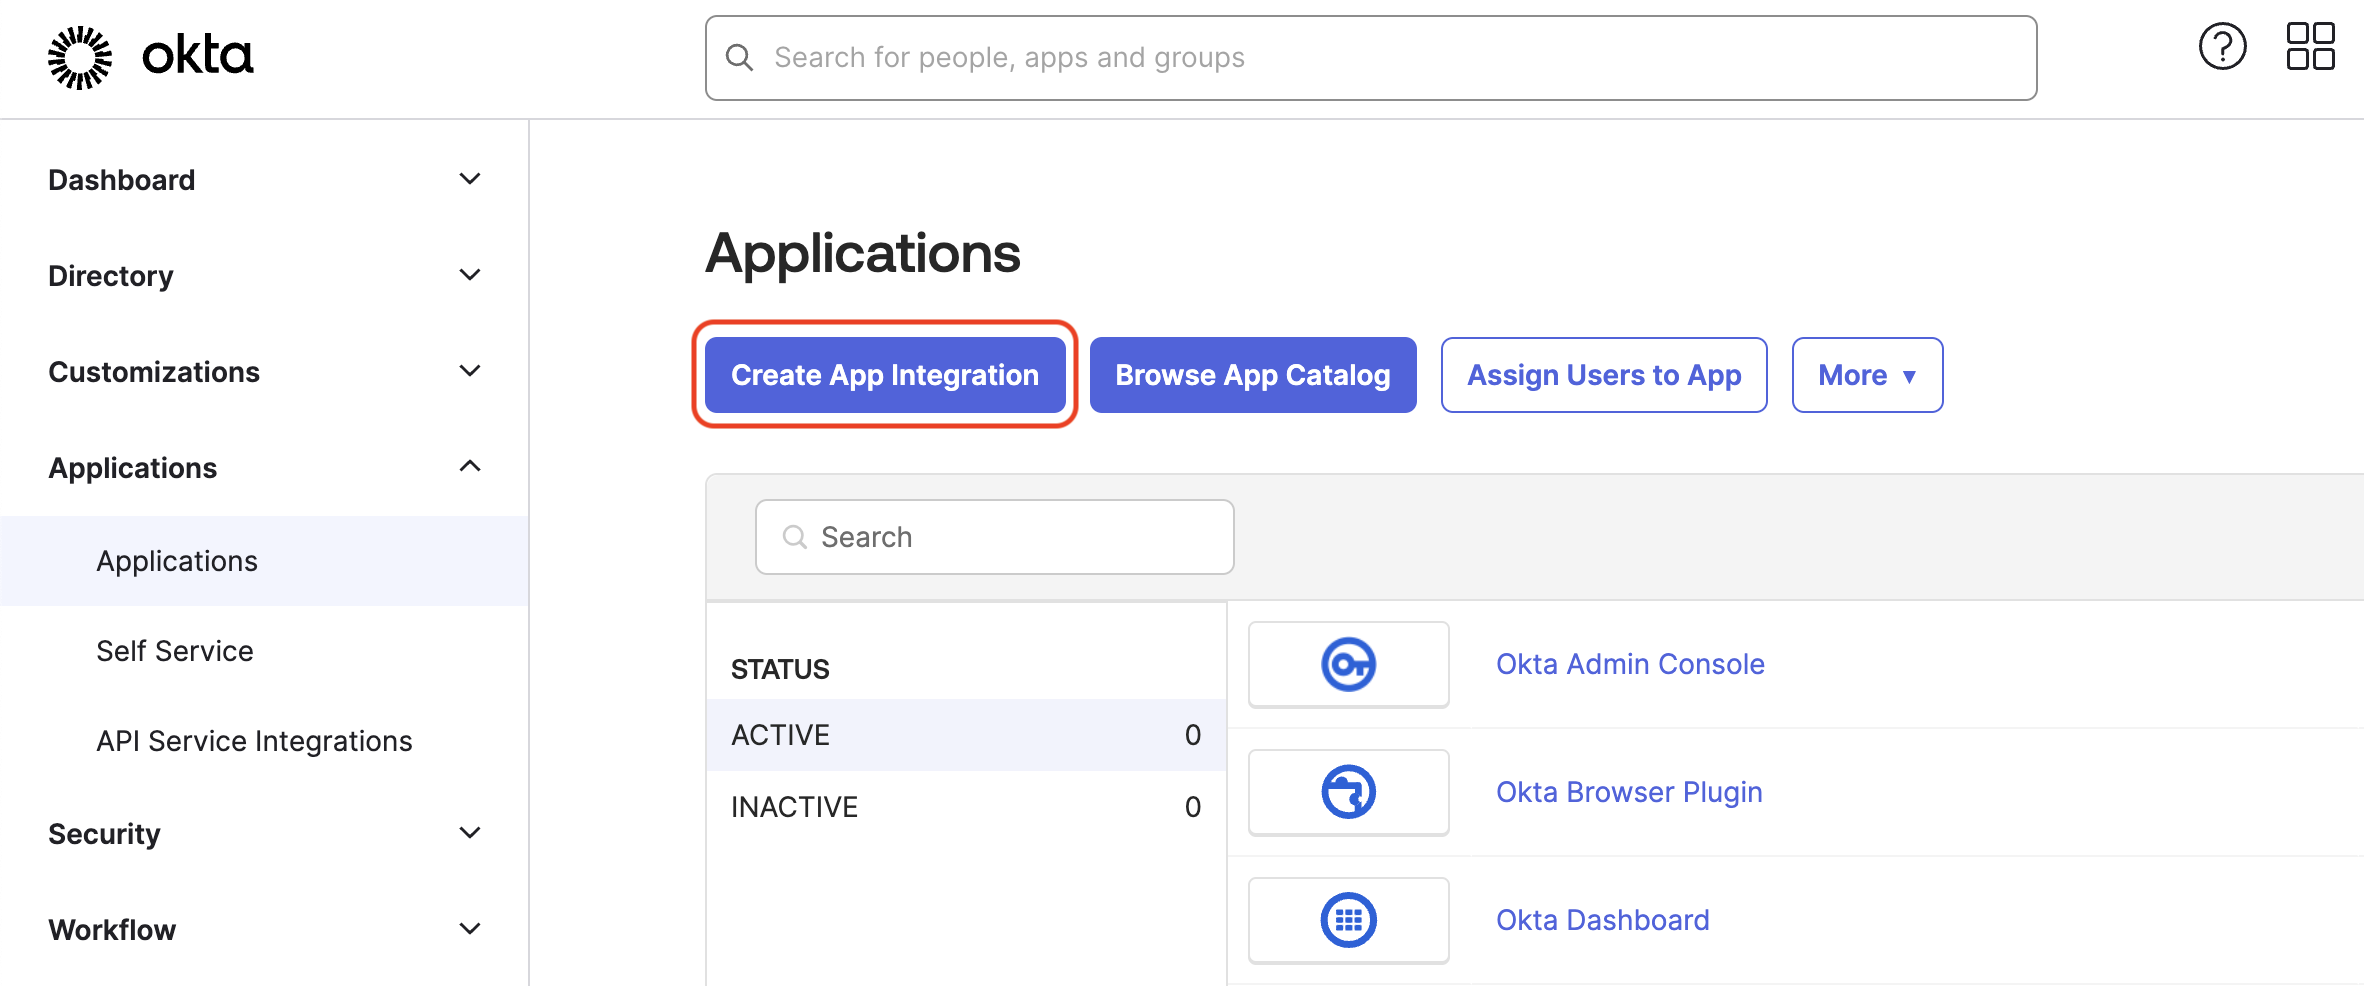
2. Go to **Applications** > **Applications** and then click **Create App Integration**.
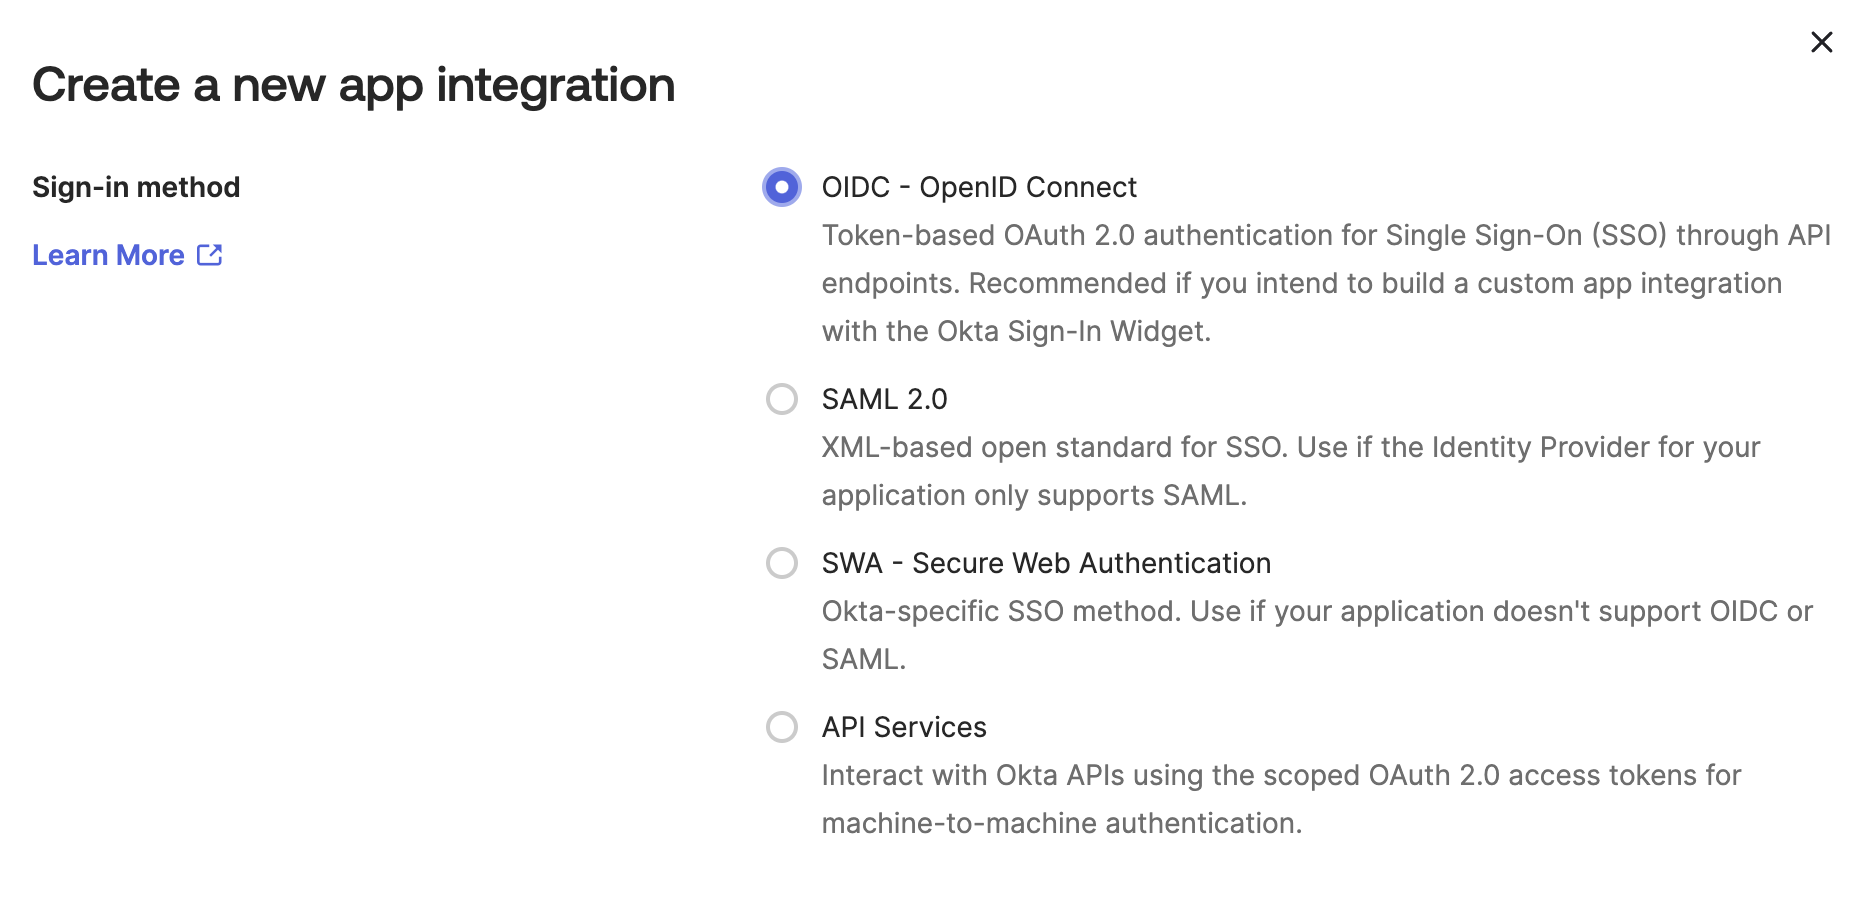
 3. In the **Create a new app integration** dialog, choose **OIDC - OpenID Connect** as the Sign-in method.
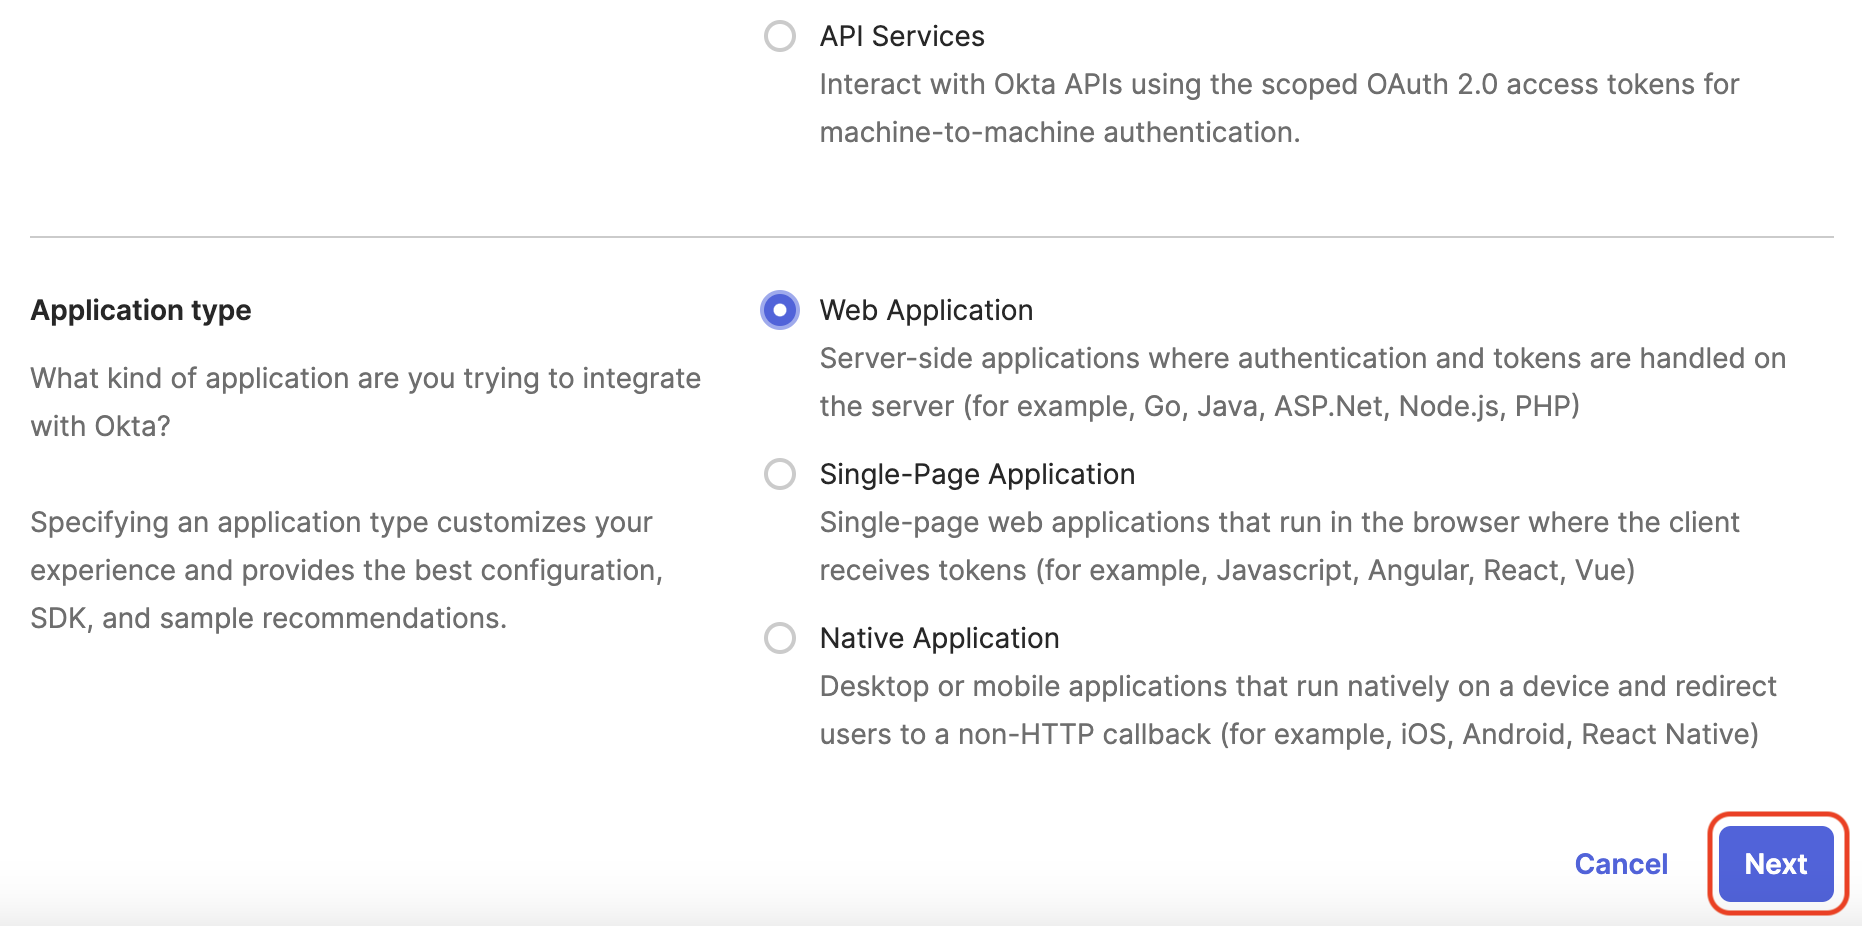
 4. Choose **Web Application** as the **Application type** and click **Next**.
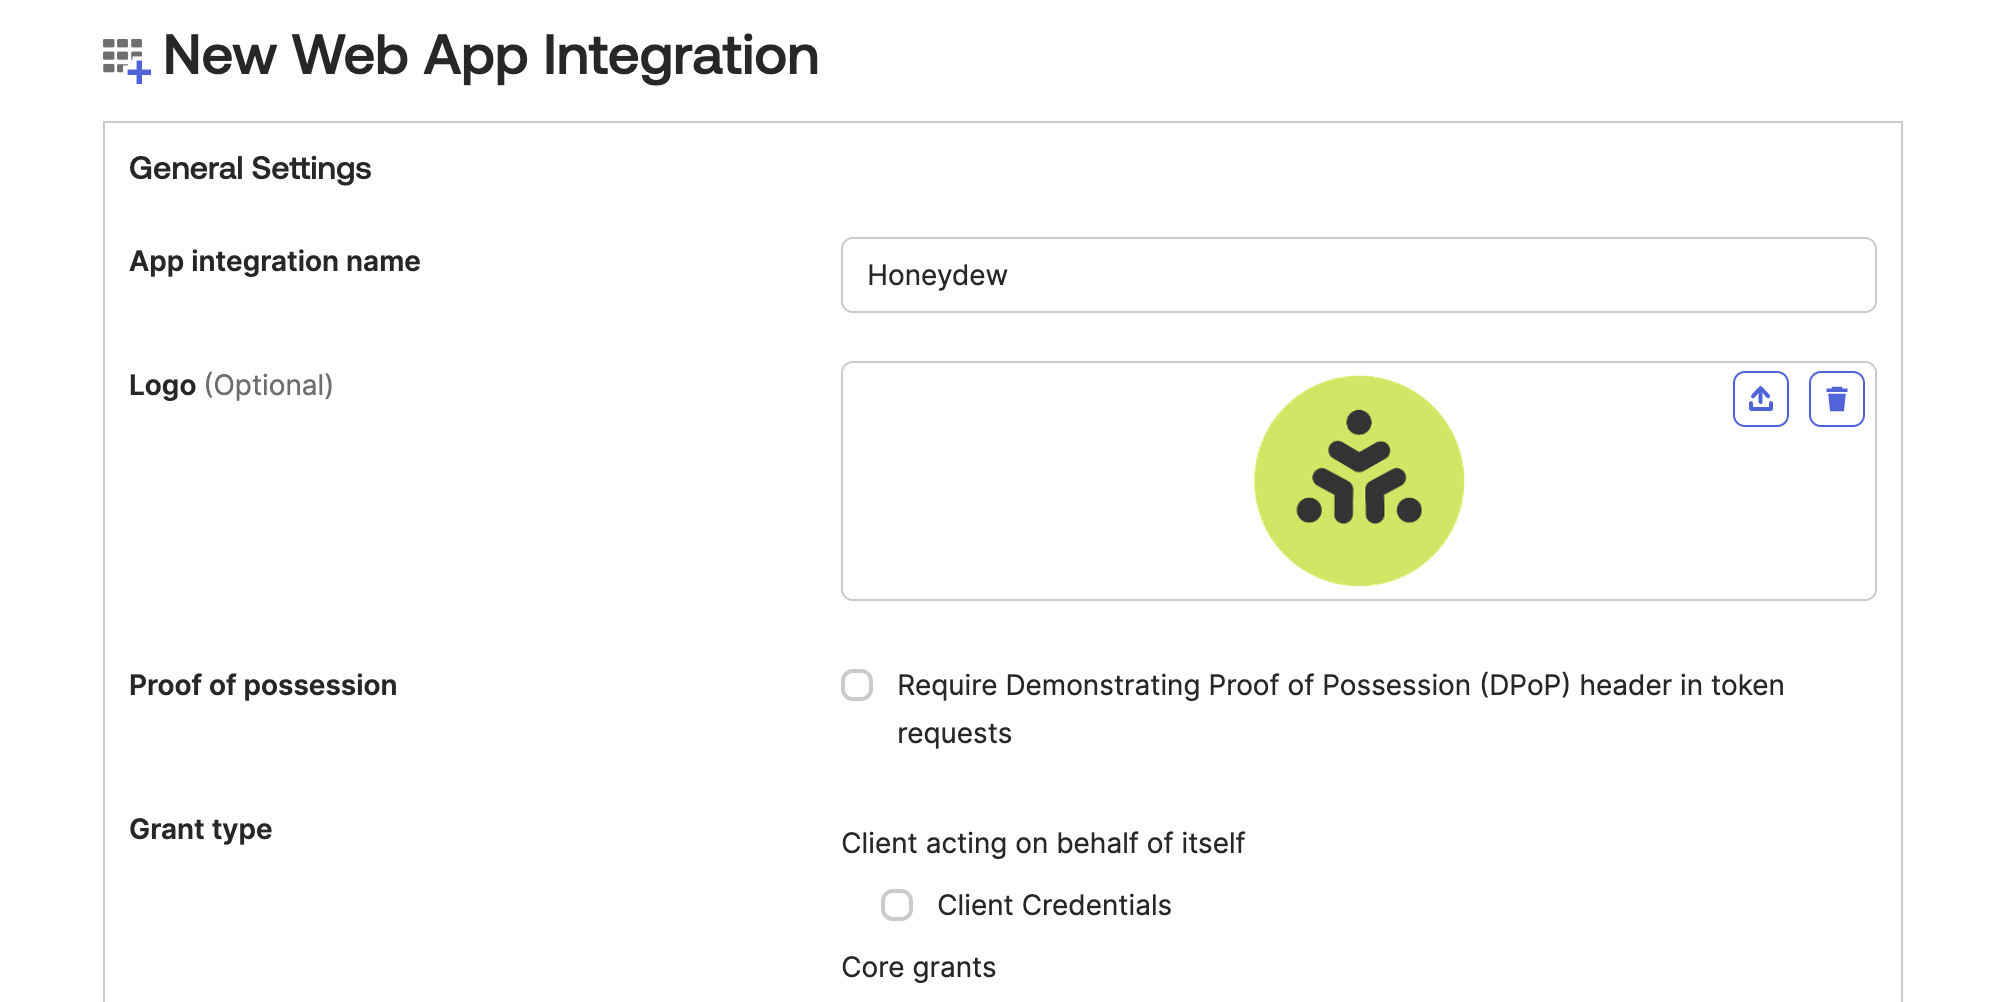
 5. Choose a name for the app integration (e.g. **Honeydew**), and add an application icon (you can use the Honeydew
[logo](https://mintlify.s3.us-west-1.amazonaws.com/honeydew/images/HoneydewLogo.png)).
5. Choose a name for the app integration (e.g. **Honeydew**), and add an application icon (you can use the Honeydew
[logo](https://mintlify.s3.us-west-1.amazonaws.com/honeydew/images/HoneydewLogo.png)).
 6. In the **Sign-in redirect URIs** field, add the following URI: `https://auth.honeydew.cloud/login/callback`
If you are using an EU-based Honeydew instance, use the following URI instead of the above: `https://auth.eu.honeydew.cloud/login/callback`
7. In the **Sign-out redirect URIs** field, add the following URI: `https://app.honeydew.cloud`
6. In the **Sign-in redirect URIs** field, add the following URI: `https://auth.honeydew.cloud/login/callback`
If you are using an EU-based Honeydew instance, use the following URI instead of the above: `https://auth.eu.honeydew.cloud/login/callback`
7. In the **Sign-out redirect URIs** field, add the following URI: `https://app.honeydew.cloud`
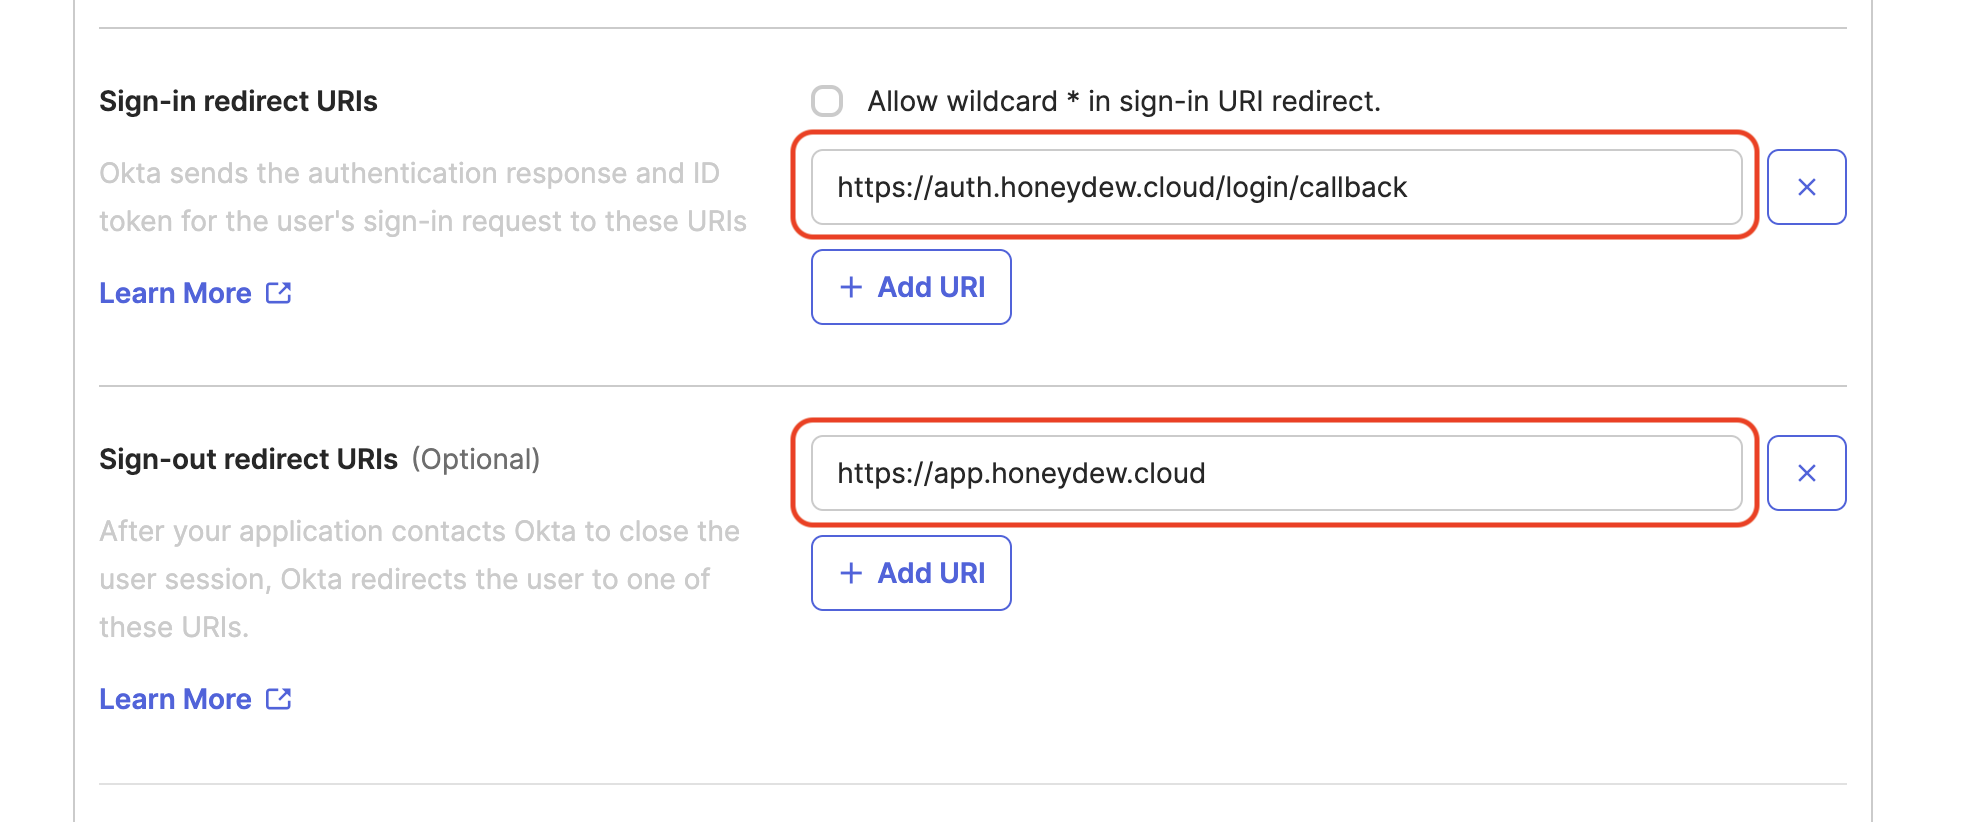 If you are using an EU-based Honeydew instance, use the following URI instead of the above: `https://app.eu.honeydew.cloud`
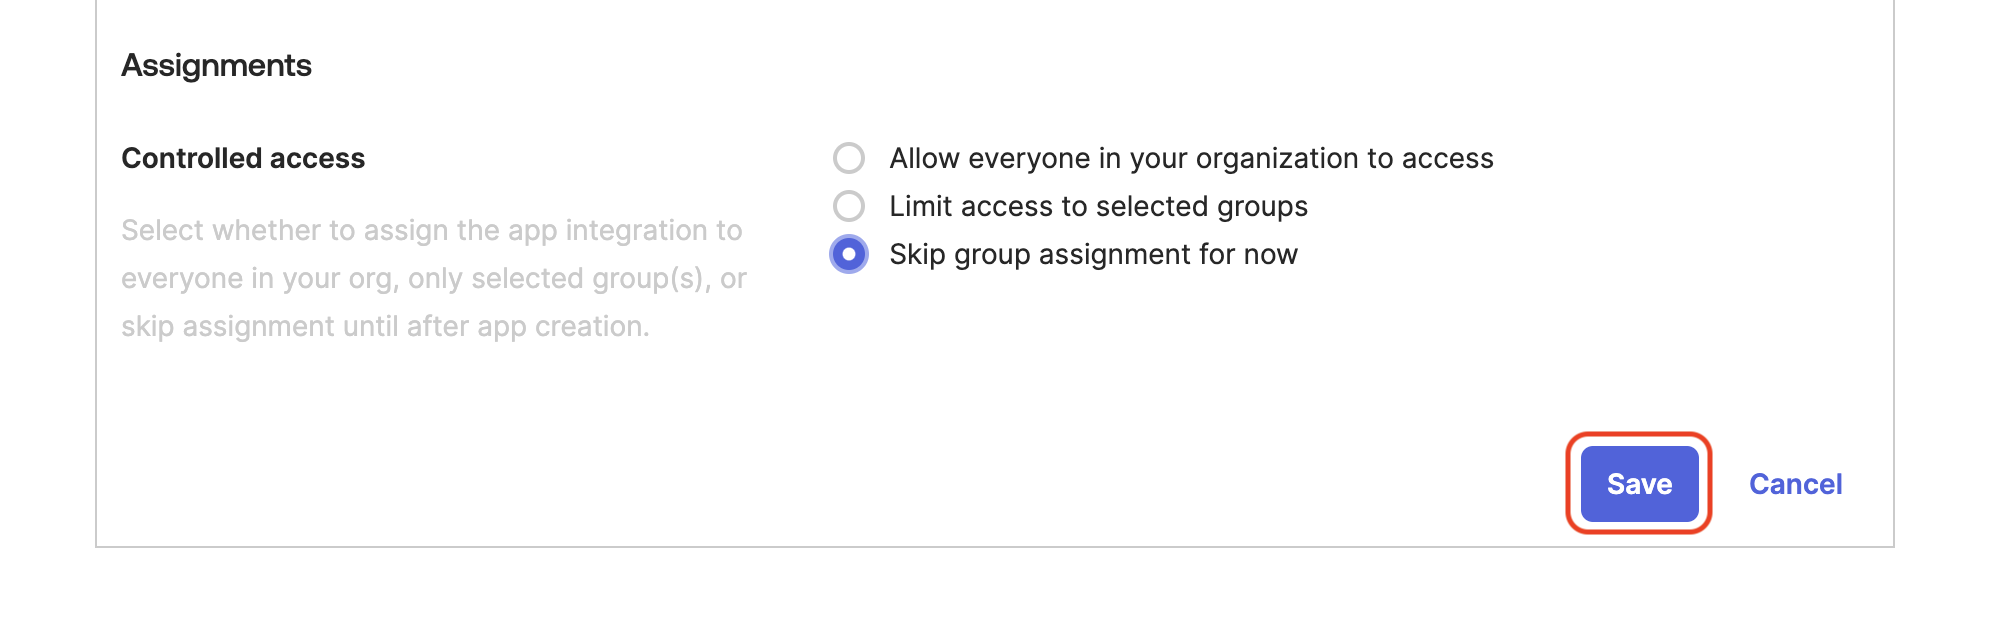
8. In **Assignments**, choose the users or groups that will have access to the Honeydew app.
9. Click **Save**.
If you are using an EU-based Honeydew instance, use the following URI instead of the above: `https://app.eu.honeydew.cloud`
8. In **Assignments**, choose the users or groups that will have access to the Honeydew app.
9. Click **Save**.
 10. In the newly created app integration, and go to the **General** tab.
Save the following information as displayed in the **General** tab:
* **Client ID** (displayed in the **Client Credentials** section)
* **Secret** (displayed in the **Client Secrets** section, click **Show** to display the secret)
This information will be needed once we configure the integration in Honeydew.
Now that we have our Okta app integration ready, we need to configure it in Honeydew.
Please pass the following information to your Honeydew contact or to [support@honeydew.ai](mailto:support@honeydew.ai):
* **Okta Domain**: The domain used to access your Okta account (e.g. `mydomain.okta.com`)
* **Client ID** you have saved from the Okta app integration in the previous step
* **Client Secret** you have saved from the Okta app integration in the previous step
* **Email domains** used in your company's email addresses
You will receive back from Honeydew the following information:
* **Initiate login URI** (something like `https://app.honeydew.cloud/login?connection=`)
It you would like to create a SCIM integration, please also ask for the following:
* **SCIM Endpoint URL**
* **SCIM Bearer Token** (a long string of characters)
1. In Okta, go to **Applications** > **Applications** and select your application name.
Select the **General** tab and click **Edit**.
2. Scroll down to the Login section.
In the **Login initiated by** field, change the selection to **Either Okta or App**.
In **Login flow**, select **Redirect to app to initiate login (OIDC compliant)**.
In **Initiate login URI**, add the URI you received from Honeydew.
10. In the newly created app integration, and go to the **General** tab.
Save the following information as displayed in the **General** tab:
* **Client ID** (displayed in the **Client Credentials** section)
* **Secret** (displayed in the **Client Secrets** section, click **Show** to display the secret)
This information will be needed once we configure the integration in Honeydew.
Now that we have our Okta app integration ready, we need to configure it in Honeydew.
Please pass the following information to your Honeydew contact or to [support@honeydew.ai](mailto:support@honeydew.ai):
* **Okta Domain**: The domain used to access your Okta account (e.g. `mydomain.okta.com`)
* **Client ID** you have saved from the Okta app integration in the previous step
* **Client Secret** you have saved from the Okta app integration in the previous step
* **Email domains** used in your company's email addresses
You will receive back from Honeydew the following information:
* **Initiate login URI** (something like `https://app.honeydew.cloud/login?connection=`)
It you would like to create a SCIM integration, please also ask for the following:
* **SCIM Endpoint URL**
* **SCIM Bearer Token** (a long string of characters)
1. In Okta, go to **Applications** > **Applications** and select your application name.
Select the **General** tab and click **Edit**.
2. Scroll down to the Login section.
In the **Login initiated by** field, change the selection to **Either Okta or App**.
In **Login flow**, select **Redirect to app to initiate login (OIDC compliant)**.
In **Initiate login URI**, add the URI you received from Honeydew.
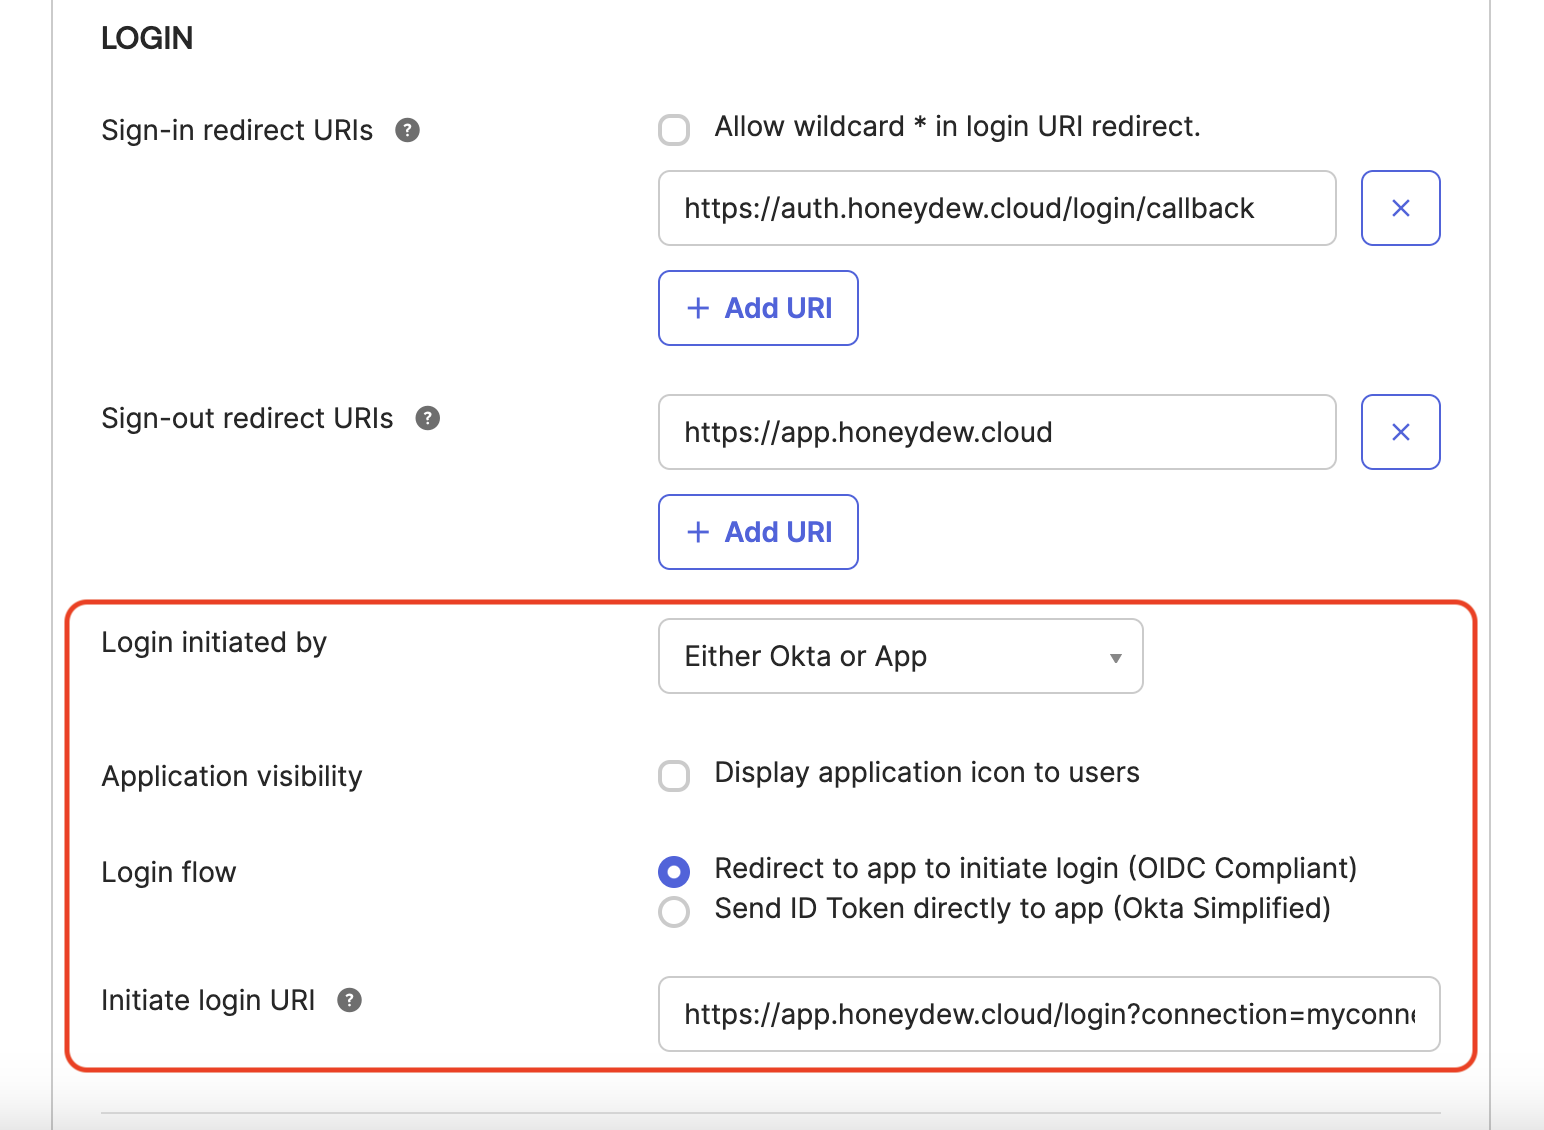 3. Scroll to the bottom of the **Login** section and click **Save**.
4. Optionally, assign any users or groups that should have access to Honeydew.
5. Once the configuration is complete, you can test the OIDC setup by logging in to Honeydew.
Any user with an email address that matches the domain you provided will be able to log in using Okta.
Upon login they will be redirected to the Okta login page.
The steps below are optional and only needed if you want to set up a SCIM integration from Okta to Honeydew.
You can find this documentation also [here](https://auth0.com/docs/authenticate/protocols/scim/inbound-scim-for-okta-workforce-connections#configure-scim-in-okta-workforce-for-oidc-apps).
1. Confirm that an OpenID Connect application [has already been registered](https://help.okta.com/en-us/content/topics/apps/apps_app_integration_wizard_oidc.htm) in the Okta Workforce tenant for OIDC-based user authentication.
2. Confirm that your OpenID Connect application has [disabled Federation Broker Mode](https://help.okta.com/en-us/content/topics/apps/apps-fbm-main.htm).
3. Register a second application in the Okta portal by selecting **Applications** > **Applications**, then choose **Create App Integration, Secure Web Authentication**, and **Next**.
4. On the **General App Settings** page, set a name and a URL, then select **Do not display application icon to users**. The URL entered is not used in the SCIM integration.
5. Select **Finish**.
6. Navigate to the **General** tab, then choose **Edit** and go to the **Provisioning** section.
7. Choose **SCIM**, then **Save**.
8. Navigate to the integration's **Provisioning** tab and then the **Integration** tab.
9. Select **Edit**, then go to the **SCIM connector base URL** section and enter the **SCIM Endpoint URL** value you were provided by Honeydew.
10. For **Unique identifier field for users**, enter **userName**.
11. Under **Supported provisioning actions**, select **Push New Users** and **Push Profile Updates**, then choose **HTTP Header** as the **Authentication Mode**.
12. Paste the token value into the **Authorization** field, picking **Test Connection Configuration** if you want to test the connection. Choose **Save**.
13. Browse to **Provisioning** > **Settings** > **To App** and choose **Edit**.
14. Enable **Create Users**, **Update User Attributes**, and **Deactivate users**. Choose **Save**.
15. Under the **Attribute Mappings** section, use the **X** button to **delete** the following lines, which are not needed and may cause issues during PUT operations:
| Attribute | Value |
| ------------------ | ------------------------------------------------------------------------ |
| Primary email type | `(user.email != null && user.email != '') ? 'work' : ''` |
| Primary phone type | `(user.primaryPhone != null && user.primaryPhone != '') ? 'work' : ''` |
| Address type | `(user.streetAddress != null && user.streetAddress != '') ? 'work' : ''` |
16. Use the **Attribute Mappings** section to configure any additional SCIM attributes you want Okta WIC to send to your SCIM endpoint.
If you add custom attributes, they must include a valid SCIM 2.0 external namespace property.
For more information on external namespaces, read [Okta's help section](https://support.okta.com/help/s/article/Receiving-Invalid-externalNamespace-task-error-when-assigning-a-user-to-a-SCIMenabled-application).
17. You can now test user provisioning in the **Assignments** tab and test update operations by editing the user attributes in the **Directory** > **People** section of your Okta admin portal.
3. Scroll to the bottom of the **Login** section and click **Save**.
4. Optionally, assign any users or groups that should have access to Honeydew.
5. Once the configuration is complete, you can test the OIDC setup by logging in to Honeydew.
Any user with an email address that matches the domain you provided will be able to log in using Okta.
Upon login they will be redirected to the Okta login page.
The steps below are optional and only needed if you want to set up a SCIM integration from Okta to Honeydew.
You can find this documentation also [here](https://auth0.com/docs/authenticate/protocols/scim/inbound-scim-for-okta-workforce-connections#configure-scim-in-okta-workforce-for-oidc-apps).
1. Confirm that an OpenID Connect application [has already been registered](https://help.okta.com/en-us/content/topics/apps/apps_app_integration_wizard_oidc.htm) in the Okta Workforce tenant for OIDC-based user authentication.
2. Confirm that your OpenID Connect application has [disabled Federation Broker Mode](https://help.okta.com/en-us/content/topics/apps/apps-fbm-main.htm).
3. Register a second application in the Okta portal by selecting **Applications** > **Applications**, then choose **Create App Integration, Secure Web Authentication**, and **Next**.
4. On the **General App Settings** page, set a name and a URL, then select **Do not display application icon to users**. The URL entered is not used in the SCIM integration.
5. Select **Finish**.
6. Navigate to the **General** tab, then choose **Edit** and go to the **Provisioning** section.
7. Choose **SCIM**, then **Save**.
8. Navigate to the integration's **Provisioning** tab and then the **Integration** tab.
9. Select **Edit**, then go to the **SCIM connector base URL** section and enter the **SCIM Endpoint URL** value you were provided by Honeydew.
10. For **Unique identifier field for users**, enter **userName**.
11. Under **Supported provisioning actions**, select **Push New Users** and **Push Profile Updates**, then choose **HTTP Header** as the **Authentication Mode**.
12. Paste the token value into the **Authorization** field, picking **Test Connection Configuration** if you want to test the connection. Choose **Save**.
13. Browse to **Provisioning** > **Settings** > **To App** and choose **Edit**.
14. Enable **Create Users**, **Update User Attributes**, and **Deactivate users**. Choose **Save**.
15. Under the **Attribute Mappings** section, use the **X** button to **delete** the following lines, which are not needed and may cause issues during PUT operations:
| Attribute | Value |
| ------------------ | ------------------------------------------------------------------------ |
| Primary email type | `(user.email != null && user.email != '') ? 'work' : ''` |
| Primary phone type | `(user.primaryPhone != null && user.primaryPhone != '') ? 'work' : ''` |
| Address type | `(user.streetAddress != null && user.streetAddress != '') ? 'work' : ''` |
16. Use the **Attribute Mappings** section to configure any additional SCIM attributes you want Okta WIC to send to your SCIM endpoint.
If you add custom attributes, they must include a valid SCIM 2.0 external namespace property.
For more information on external namespaces, read [Okta's help section](https://support.okta.com/help/s/article/Receiving-Invalid-externalNamespace-task-error-when-assigning-a-user-to-a-SCIMenabled-application).
17. You can now test user provisioning in the **Assignments** tab and test update operations by editing the user attributes in the **Directory** > **People** section of your Okta admin portal.