Connection Setup
Power BI connects to Honeydew via ODBC driver using the Trino protocol.Power BI Desktop
Honeydew uses the Trino protocol to connect to Power BI. In order to connect, an ODBC driver needs to be installed.Driver installation
In order to complete the installation, you should have the following (please reach out to support@honeydew.ai to obtain access):- Access to a shared folder containing the following files:
Simba Trino 2.3 64-bit.msiHoneydew.mez
- Received
SimbaTrinoODBCDriver.liclicense file over email
- Install the Simba ODBC driver (
Simba Trino 2.3 64-bit.msi). By default, it will be installed inC:\Program Files\Simba Trino ODBC Driver\. - Place the
SimbaTrinoODBCDriver.liclicense file in the following folder:C:\Program Files\Simba Trino ODBC Driver\lib\. - Place the
Honeydew.mezfile in the custom connectors directory:C:\Users\<user>\Documents\Power BI Desktop\Custom Connectors. Create the folder if it doesn’t exist.
If you are syncing your documents with Microsoft OneDrive, the file path may vary.
If the Honeydew connector is not appearing in the list of available connectors in Power BI Desktop,
consider checking the following paths.
You may need to create the folders in your OneDrive directory if they do not already exist:
C:\Users\<user>\OneDrive\Documents\Power BI Desktop\Custom ConnectorsC:\Users\<user>\OneDrive - XXXX\Documents\Power BI Desktop\Custom Connectors
Initial Setup
- Open Power BI Desktop
- In case you get a notification about “Uncertified Connectors”:
- In order to be able to use the connector, please go to Options and Settings > Options > Security, and set the Data Extensions setting to “Allow any extension to load without validation or warning”:

- Restart Power BI Desktop
- In order to be able to use the connector, please go to Options and Settings > Options > Security, and set the Data Extensions setting to “Allow any extension to load without validation or warning”:
- In Honeydew, go to the menu of an existing workspace, and click Power BI > Download datasource. A *.pbit file will get downloaded.
- Open the downloaded *.pbit file in Power BI Desktop.
- Go to File > Options and settings > Data source settings. The following connect dialog will open up:
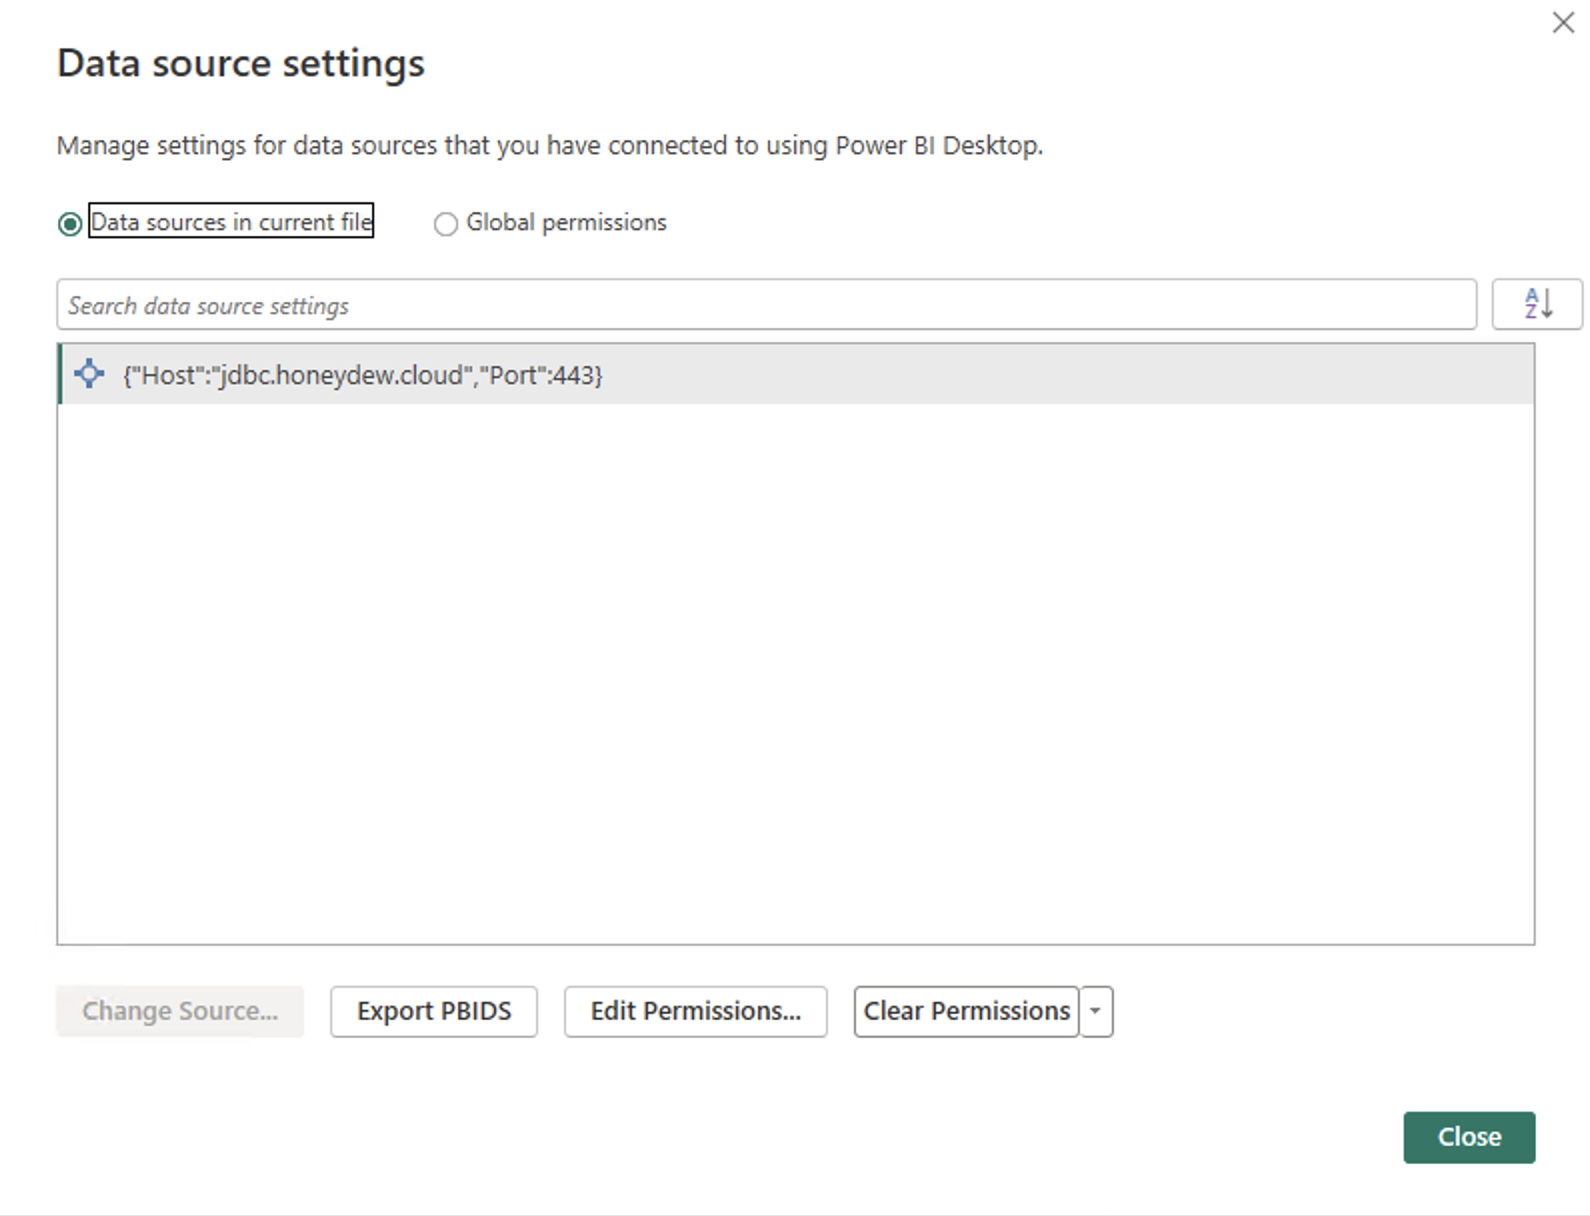
- Click “Edit Permissions…”. The following dialog will open up:
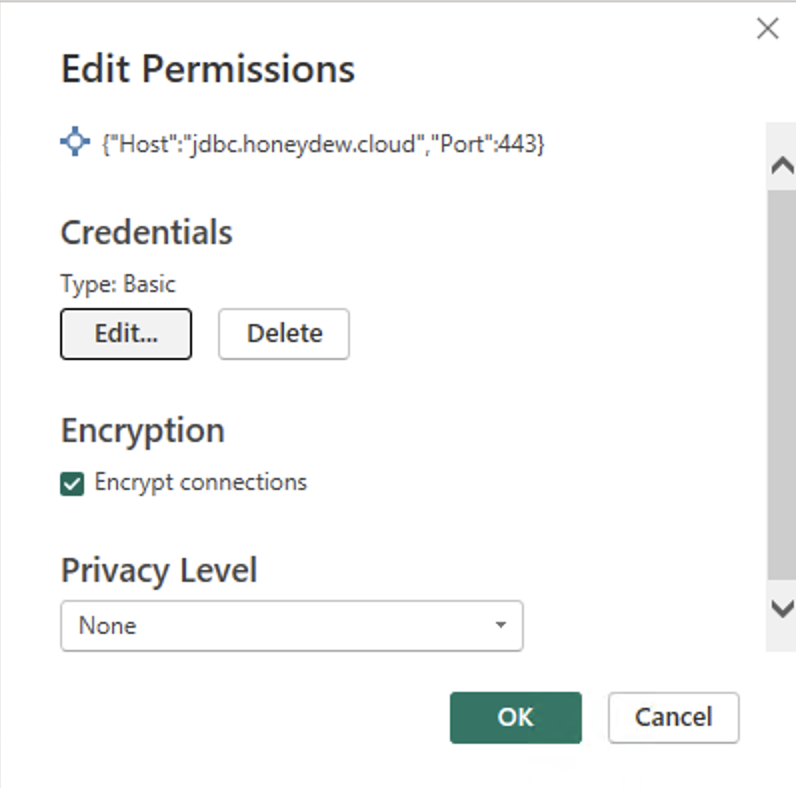
- Click Edit. The following dialog will open up:
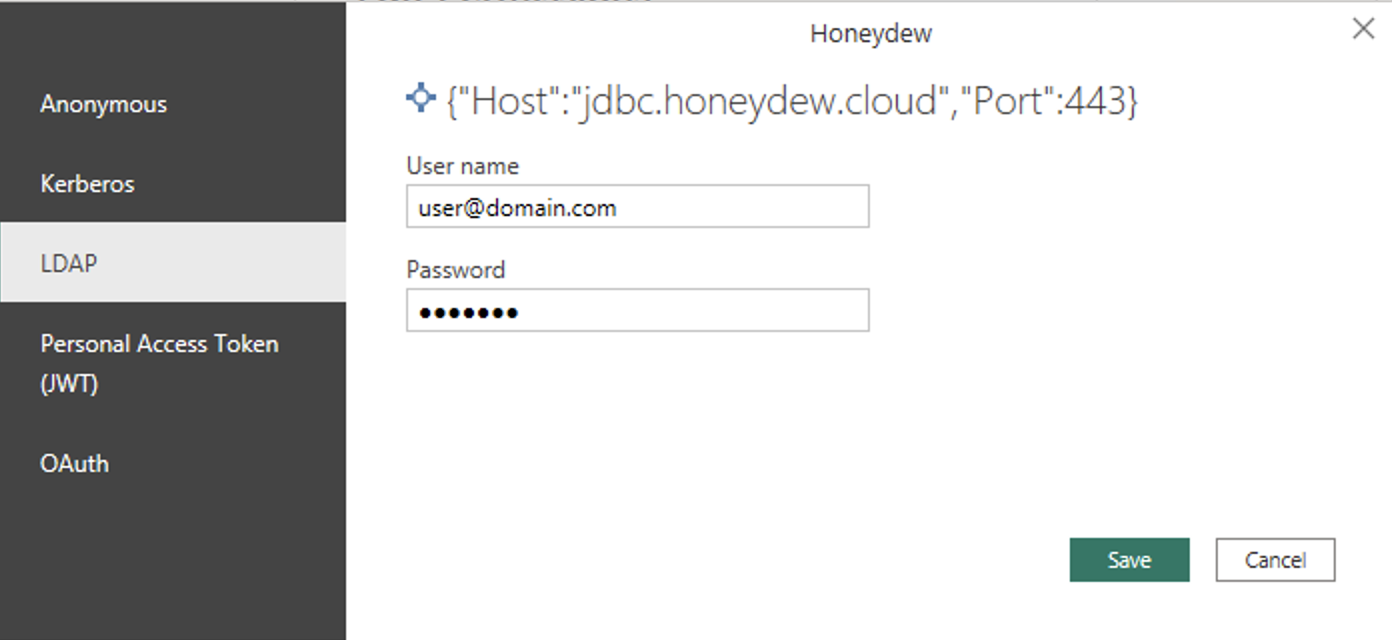
- Choose the OAuth option, and click Sign in.
- You can now use the datasource downloaded from Power BI - it has a direct connection to Honeydew.
Power BI Service
Power BI Gateway Installation
Honeydew connects to Power BI Service by using the Power BI gateway. See the installation manual on how to install an on-premise gateway. If you are unable to have a Power BI gateway in your organization, please contact support@honeydew.ai.Driver Installation & Power BI Gateway Setup
In order to complete the installation, you should have the following (please reach out to support@honeydew.ai to obtain access):- Access to a shared folder containing the following files:
Simba Trino 2.3 64-bit.msiHoneydew.mez
- Received
SimbaTrinoODBCDriver.liclicense file over email
- Install the Simba ODBC driver (
Simba Trino 2.3 64-bit.msi). By default, it will be installed inC:\Program Files\Simba Trino ODBC Driver\. - Place the
SimbaTrinoODBCDriver.liclicense file in the following folder:C:\Program Files\Simba Trino ODBC Driver\lib\. - Place the
Honeydew.mezfile in the custom connectors directory that can be accessible by the Power BI Gateway. By default that isC:\Windows\ServiceProfiles\PBIEgwService\Documents\Power BI Desktop\Custom Connectors. Create the folder if it doesn’t exist. - Complete the steps as described in the Enable and use custom connectors section.
Creating a Data Source Connection in Power BI Service
After setting up the Power BI Gateway and installing the required drivers, you need to create a data source connection in Power BI Service to connect to Honeydew.- Sign in to Power BI Service
- Click the gear icon in the upper-right corner and select Manage connections and gateways
- In the Connections tab, click New to add a new data source
- Configure the connection with the following details:
- Gateway cluster name: Select your configured gateway
- Connection name: Enter a descriptive name (e.g., “Honeydew Connection”)
- Data source type: Choose Honeydew from the list of available connectors
- Server: Enter
jdbc.honeydew.cloud - Port: Enter
443 - Authentication method: Choose LDAP
- Username: Enter your Honeydew API key or username
- Password: Enter your Honeydew API secret or password
- Click Apply to create the data source connection
- Click Close to close the data source settings dialog
If your organization uses a custom hostname for the JDBC connection,
you can locate it in the Honeydew UI, under the JDBC section in Settings
Publishing a model from Power BI Desktop
- Load a semantic model on Power BI Desktop (as described here), that is connected to Power BI Service.
- Save the model as a *.pbix file.
- Publish the saved model to the Power BI Service.
- Open the model in the Power BI Service.
- You can now build reports on top of the published model or use the model directly from Power BI Service.
API Integration
The Power BI API integration enables direct publishing of semantic models from Honeydew to the Power BI Service without requiring manual download of a*.pbit / *.pbix files.
You can find instructions on how to set up API integration with Power BI here.