

1
Create a Bitbucket Repository
Create a new Bitbucket private repository using one of these options:
- Create a new repository
- Clone from the Honeydew quick-start example.
2
Configure allowed IP addresses
If you are restricting access to your Bitbucket workspace using IP addresses allow list,
add the IP addresses displayed in the Bitbucket connection screen in Honeydew App settings page
to the “IP Allow List” of your Bitbucket workspace.
For the Honeydew Cloud deployment, the following IP addresses are used:
34.86.209.9034.145.147.92
3
Set up Honeydew
Please reach out to support@honeydew.ai and send the full repository name -
org-name/repository-name (e.g. honeydew-ai/honeydew-quickstart).4
Create a Bitbucket Token
Create a new Bitbucket repository token for Honeydew integration:
- In Bitbucket, under the repository you have created for Honeydew, go to Repository settings -> Access tokens
- Create a new Repository access token. Set the
Writepermission underPull requests: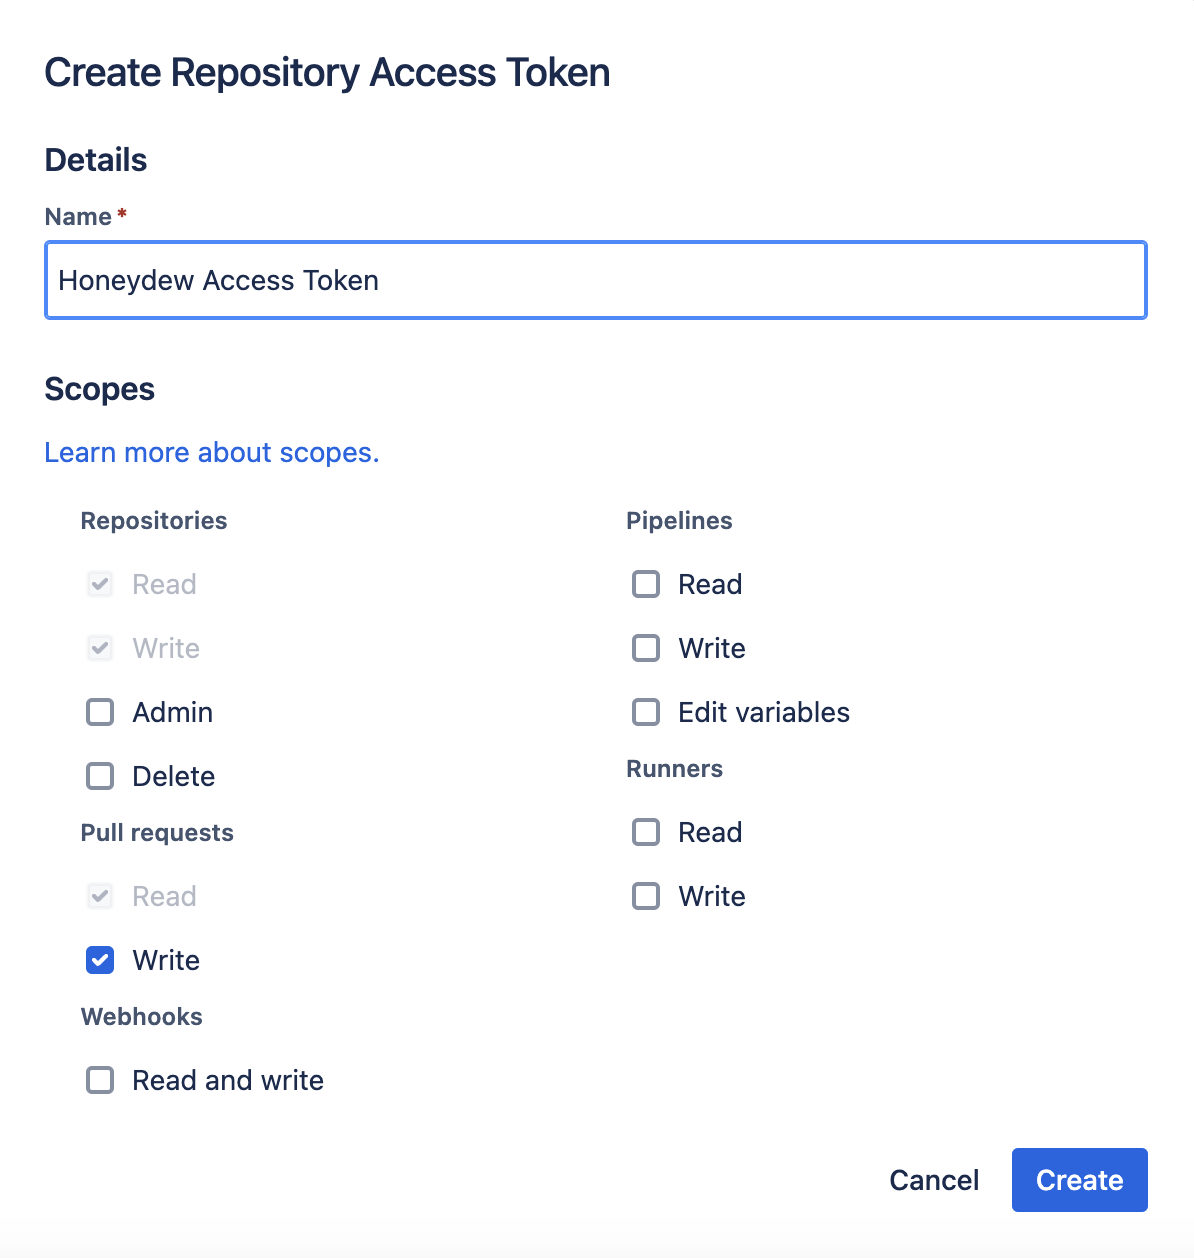
5
Configure the token in Honeydew
In the Honeydew application, go to Settings -> Bitbucket and configure the token.
To validate semantic-layer changes in your CI/CD pipeline, see the
CI/CD Overview.
Clean up merged branches
Honeydew creates a Pull Request when you publish changes, but does not delete the branch when that Pull Request is merged in Bitbucket. Set source branch deletion as the default so merged branches do not accumulate in the Honeydew branch list:- In your repository, go to Repository settings -> Branching model (under Workflow)
- Set Delete source branch by default to On
This sets the default for the merge dialog. Whoever merges can still clear the option,
which leaves the branch in place.